Workspaces
A workspace is a space inside your organization for organizing flows. Flows always live inside a workspace, and who can see or work on a flow depends on their access to that workspace.
Use workspaces to separate flows by team or project, and to control who can build and manage them.
Scope
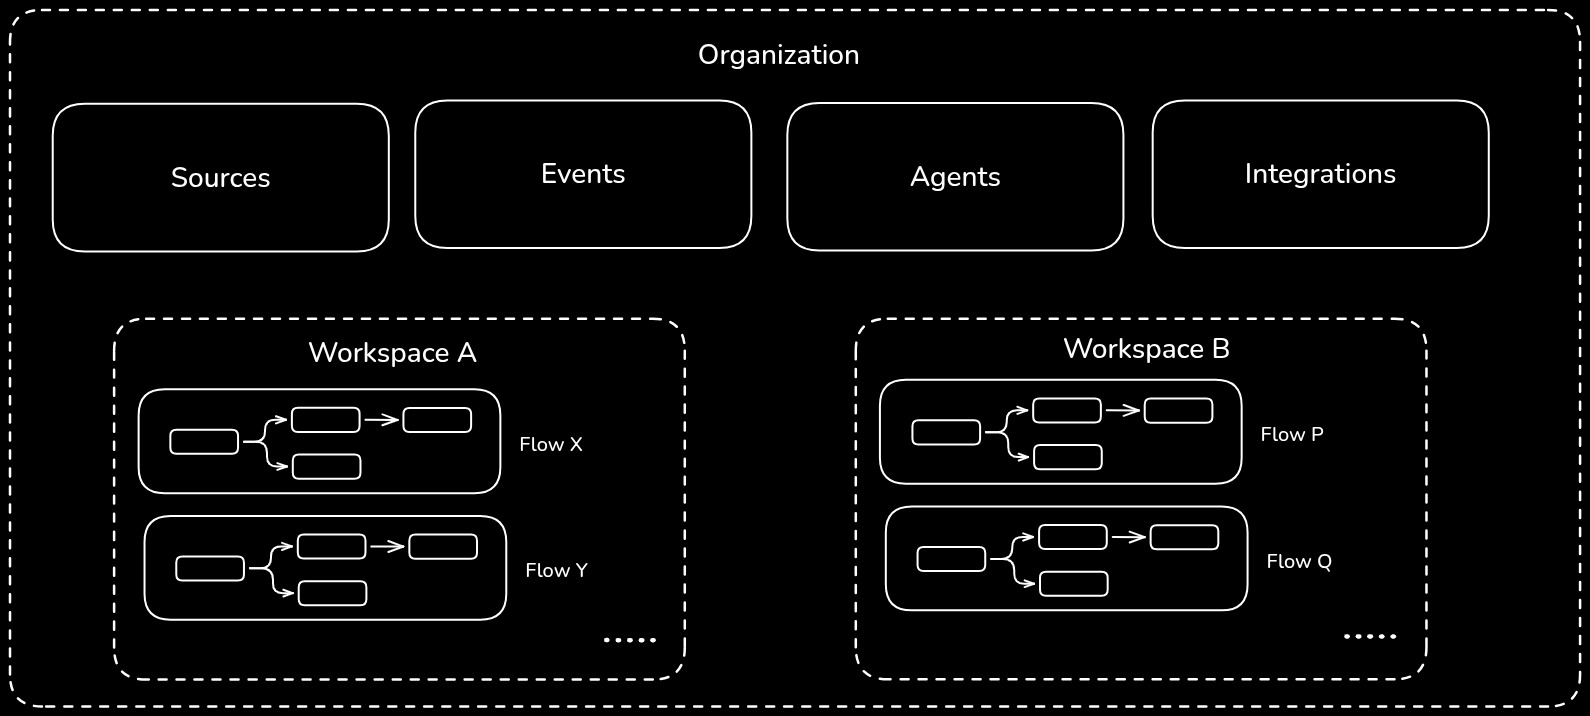
Workspaces belong to your organization. Flows live inside a workspace, while sources, events and integrations are shared across the whole organization and available to any workspace.
The workspace list
Open the organization menu in the top-left and select Settings → Workspace. The tab is available to Owners, Admins, and Workspace Managers.
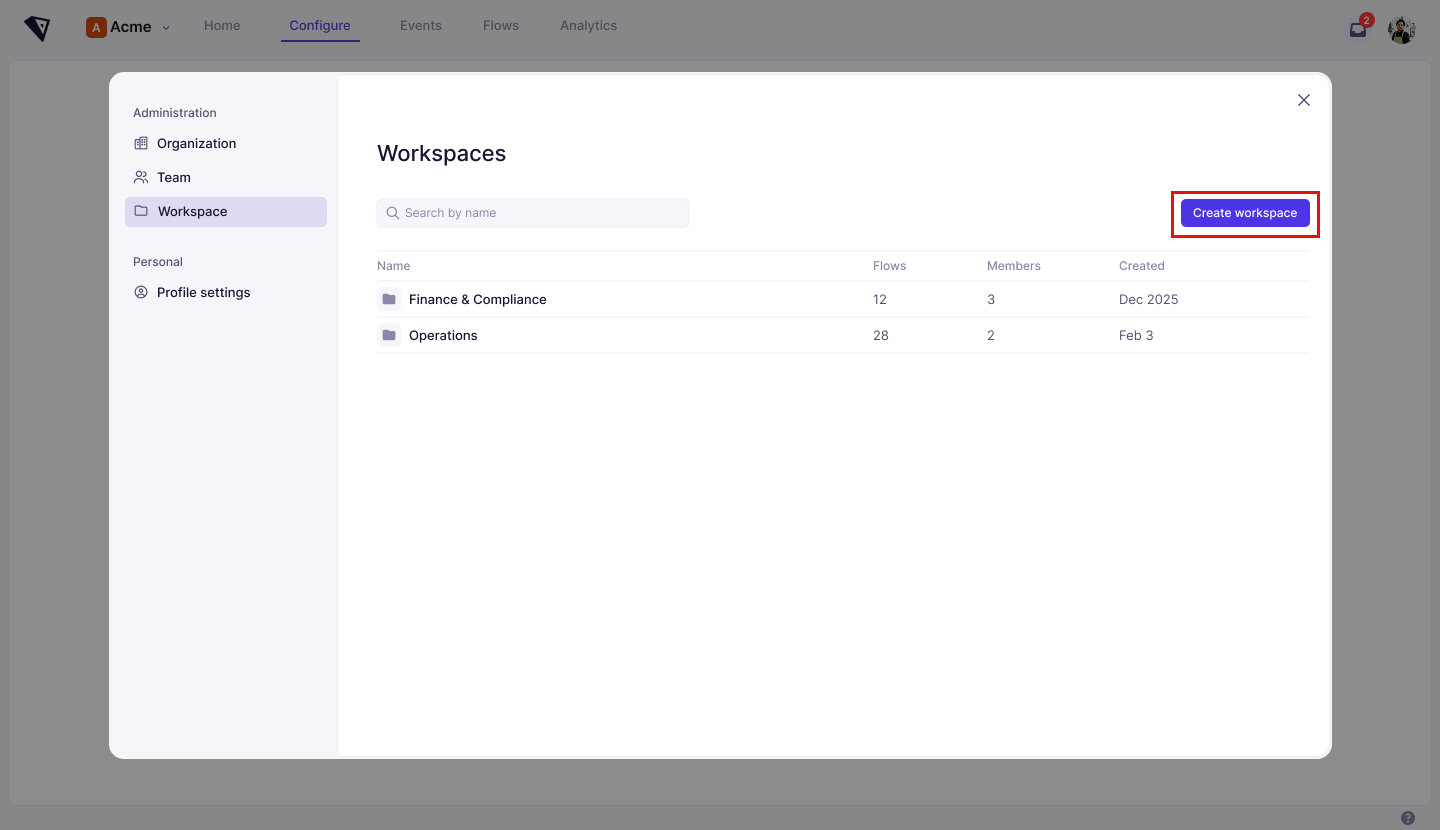
The list shows every workspace in the organization with its name, its number of flows, its number of members, and when it was created. Search by name to narrow it. Select a workspace to open its settings.
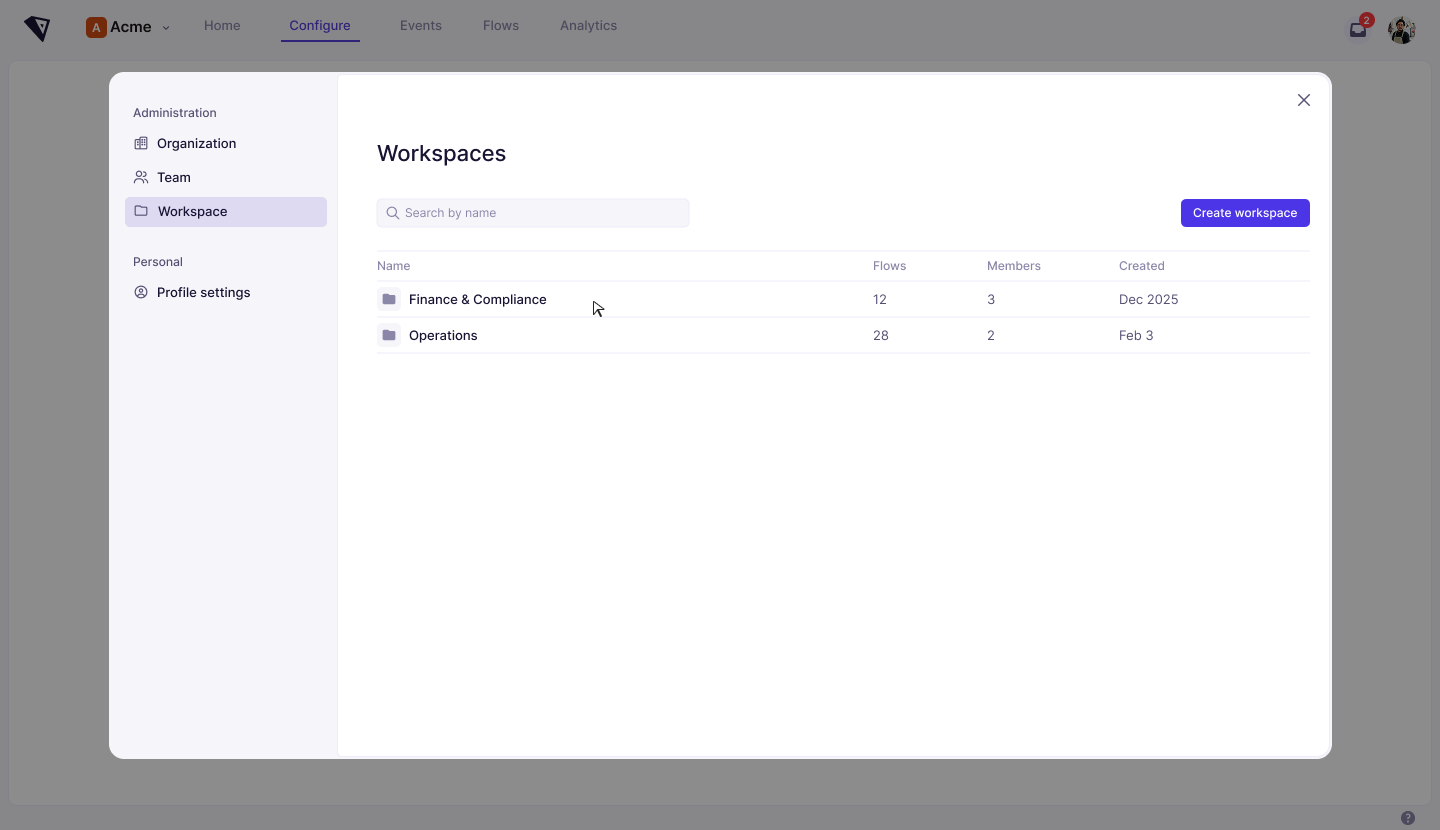
Owners, Admins, and Workspace Managers see every workspace here, including ones they are not a member of. They can rename or delete any of these workspaces, and add, remove, or change the access level of its members, without being a member themselves. Other members need Owner access in a specific workspace to manage it.
Creating a workspace
There are two ways to create a workspace.
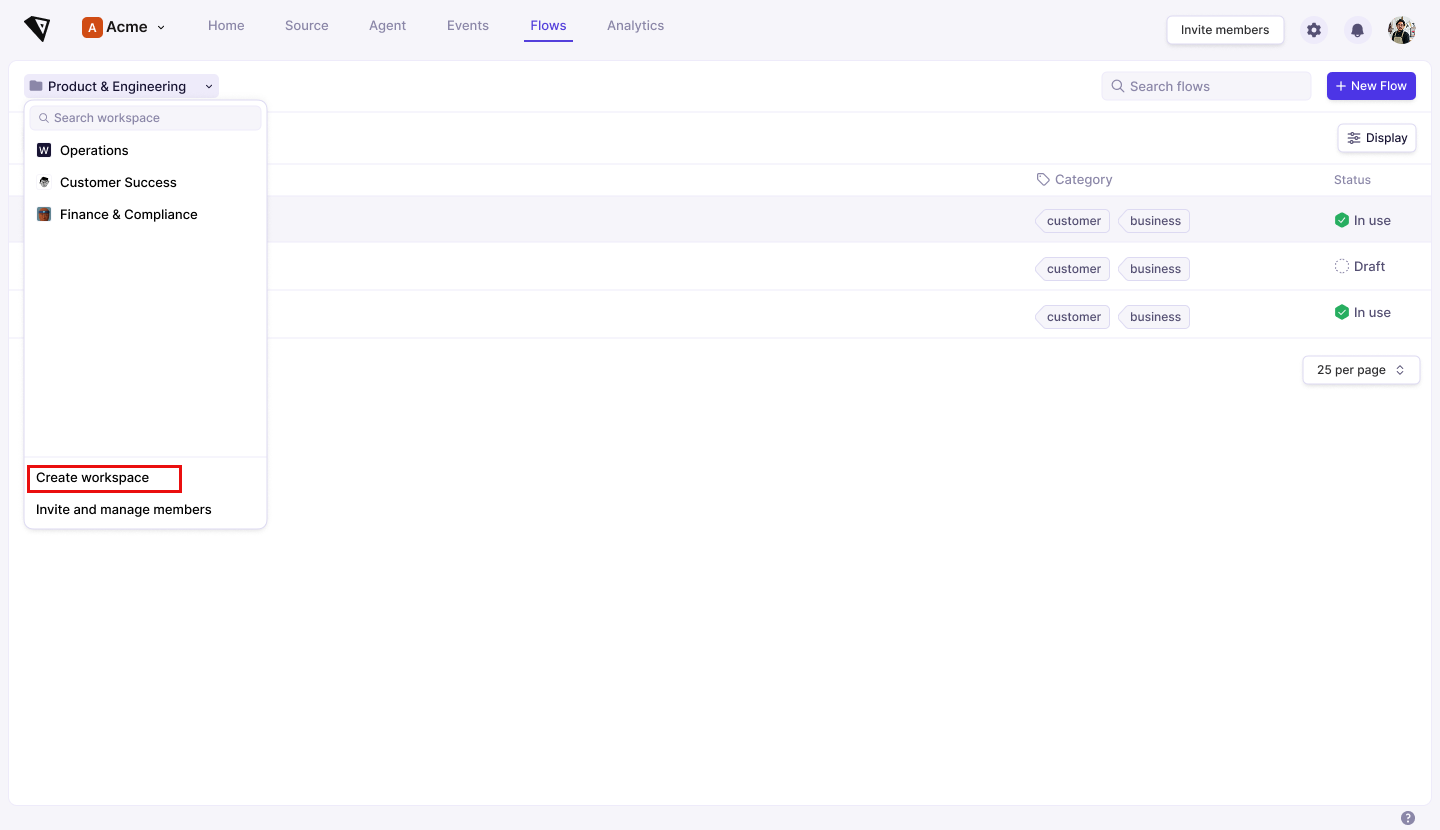
Option A: From the workspace switcher. Step 1. On the Flows page, open the workspace dropdown (top-left of the flow list).
Step 2. Select Create workspace.
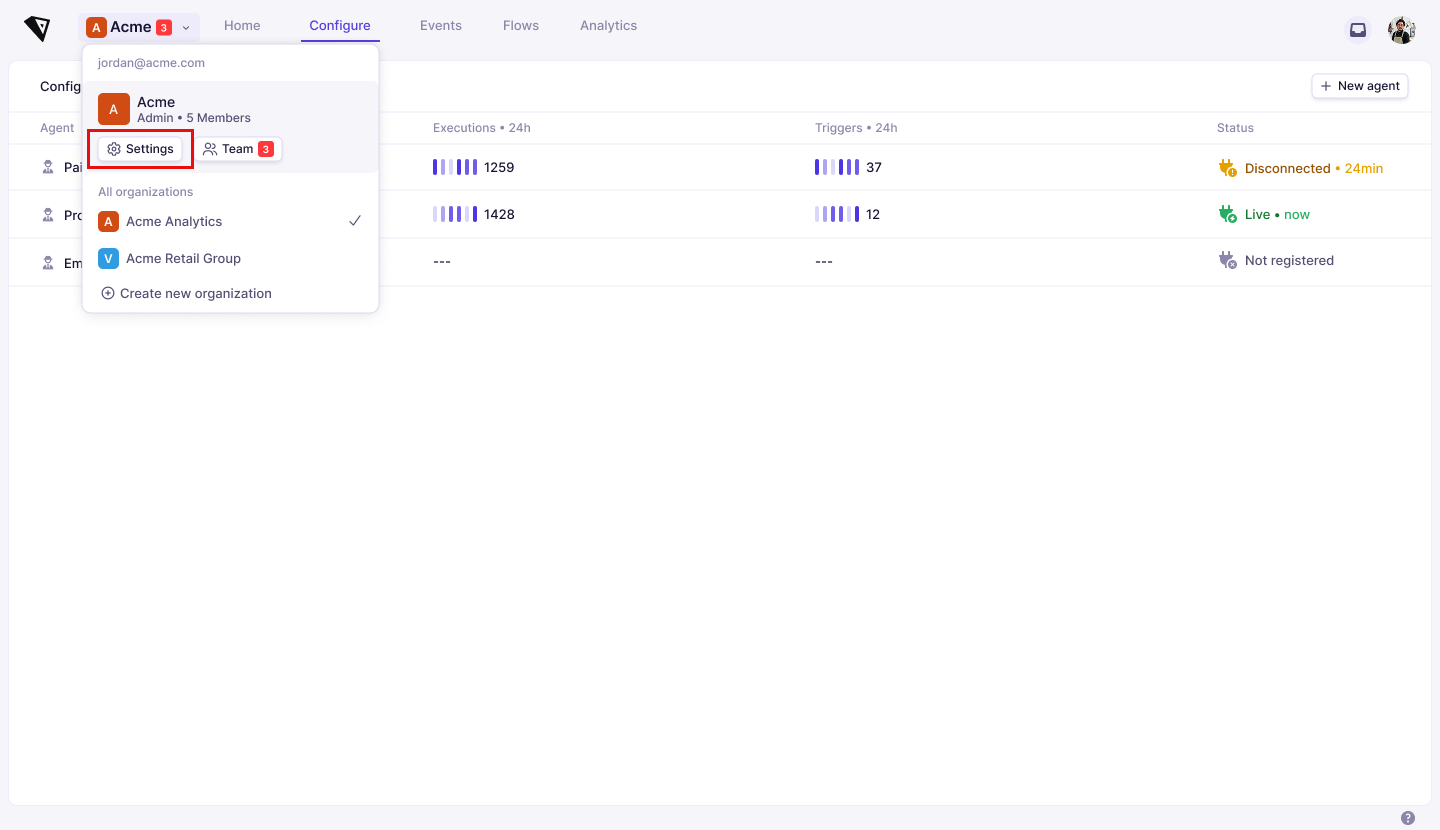
Option B: From Settings Step 1. Open the organization menu (top-left) and select Settings.
Step 2. In the settings panel, select Workspace, then select Create workspace.
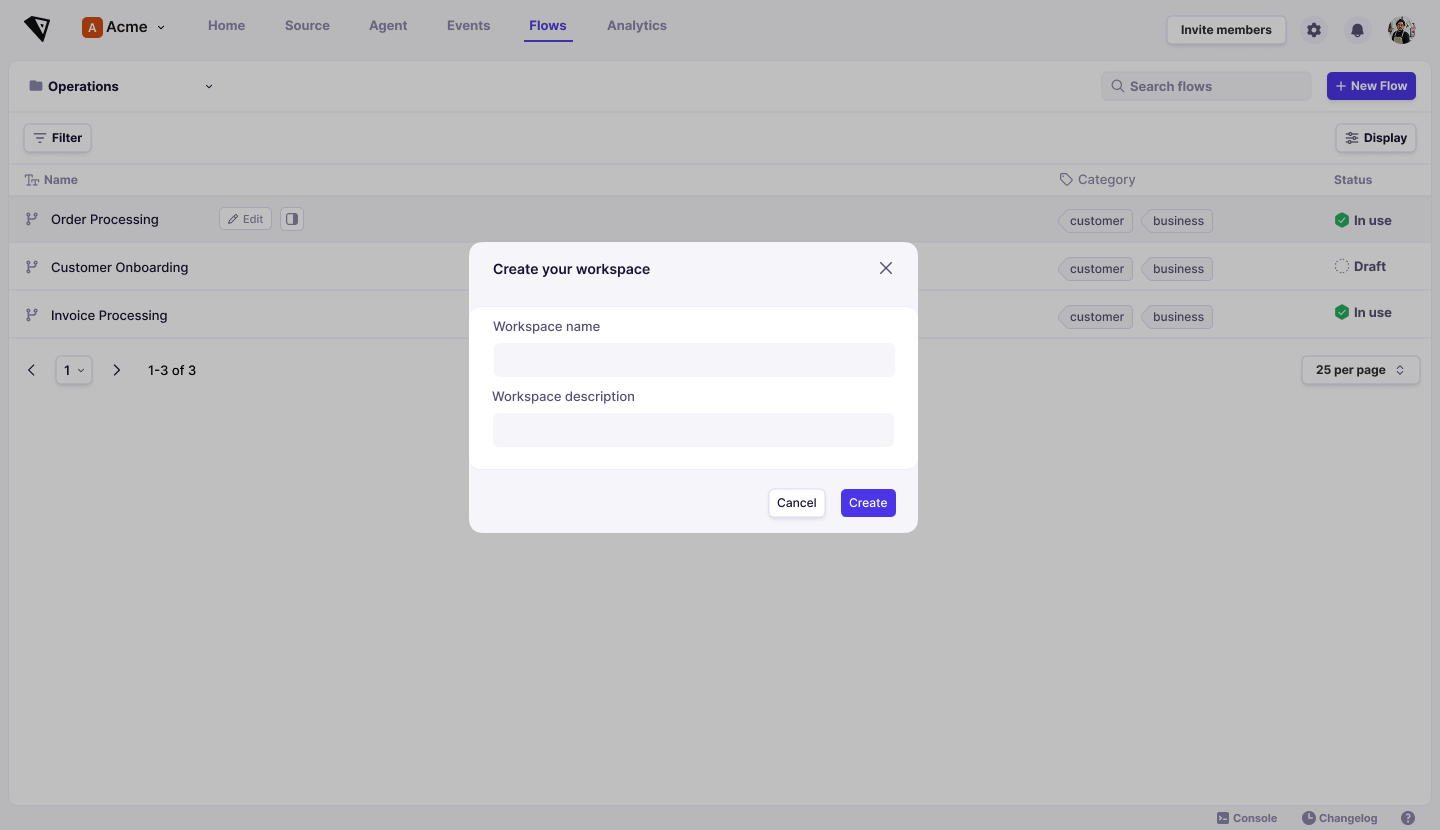
Step 3. In the Create your workspace dialog, enter a Workspace name and, optionally, a Workspace description, then select Create.
The new workspace appears in the workspace list with its flow and member counts. Whoever creates it becomes its Owner, so they can immediately build flows in it, add other members, and manage it.
Renaming a workspace
Open the workspace and edit the Workspace Name field, then confirm the change. Renaming requires Owner access in that workspace, or the Owner, Admin, or Workspace Manager organization role.
The name is how the workspace is identified in the workspace switcher and the workspace list, so keep it recognisable to the people who work in it.
Workspace members
Each workspace has its own members, managed separately from the organization.
Step 1. Open the organization menu (top-left) → Settings → Workspace to see the list of workspaces.
Step 2. Select a workspace from the list, then select Members to open its Team members view. Here you can see everyone in the workspace with their email and their workspace access level, and add new members with Add Members.
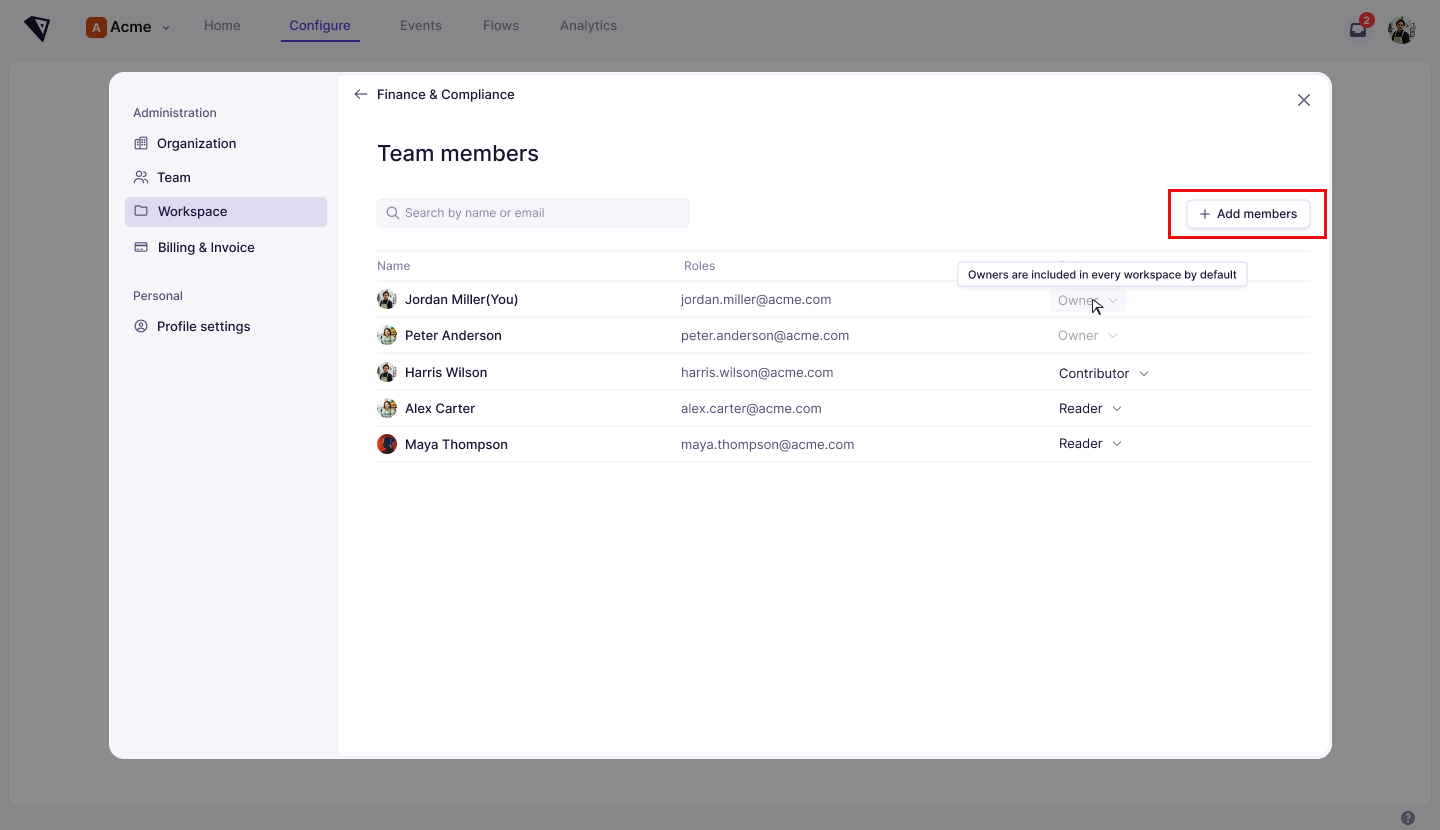
From this view you can:
- Add members: select Add Members, tick the people to add from your organization's members, and confirm. Only people who are already in the organization can be added, so invite them from Team first.
- Set an access level: select the level on a member's row and choose Owner, Contributor, or Reader. A member added without a level chosen starts as a Reader.
- Remove a member: open the menu at the end of a member's row and select Remove from workspace, then confirm. They lose access to the workspace's flows immediately, but stay in the organization.
Changing an existing member's access level requires Owner access in that workspace, or the Owner, Admin, or Workspace Manager organization role.
A member's access level determines what they can do with the flows in the workspace. For what each level allows, see Roles.
Leaving a workspace
Under Danger Zone, select Leave workspace to remove yourself from it. You lose access to the workspace's flows but keep your organization role and your access to every other workspace.
If you are the workspace's only Owner, give someone else Owner access first, or the workspace is left with nobody who can manage it.
Deleting a workspace
Under Danger Zone, select Delete, then confirm. Deleting requires Owner access in that workspace, or the Owner, Admin, or Workspace Manager organization role.
A workspace's flows live inside it and are removed with it. Events, sources, and integrations belong to the organization, so they are not affected. Deleting cannot be undone.