Registering an agent
Registration creates the agent in Vaurd, hands you its configuration and key, and connects the running agent to the platform.
An agent cannot run flows until it is registered. Registration proves the agent belongs to your organization, gives it an identity the platform can track, and provisions it with the plugins it needs.
The five steps below are in the order you do them. Steps 1 to 3 happen in the web application, step 4 happens in your own environment, and step 5 brings the two together.
The platform generates a configuration file and a key that your deployment needs, and the platform can only finish registration once the agent is already running and reachable. That is why deployment sits in the middle rather than at the start or the end.
To begin, open Configure → Agents and select + New Agent.
Step 1: Create the agent
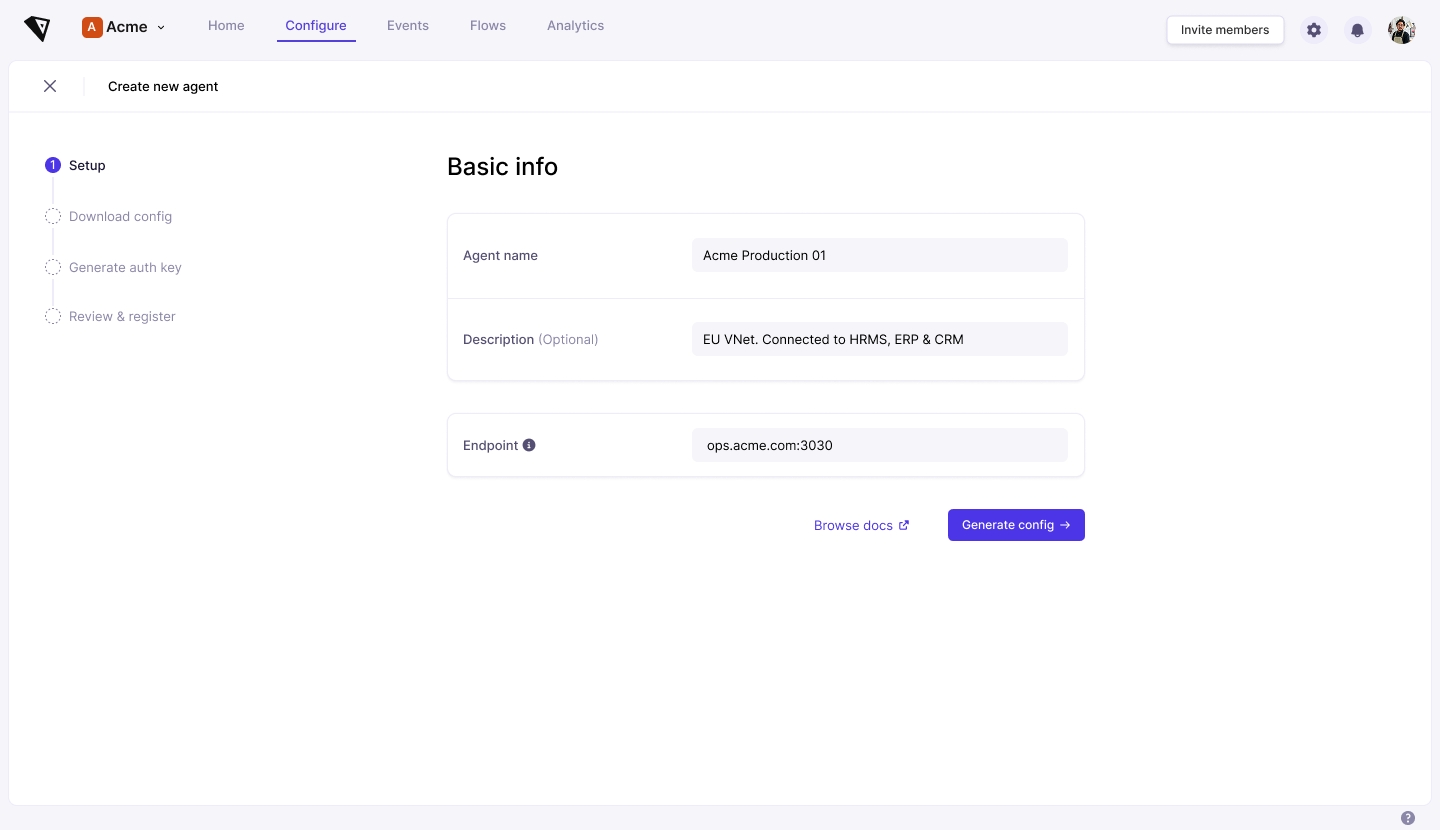
The first screen, Basic Info, asks for three things.
The Endpoint is the one to get right. Vaurd calls the agent to register it, to publish flows and to sync events, so this has to be an address the platform can reach from outside your network, pointing at the agent's core on port 5001. It does not have to resolve yet, but it must be correct by step 5.
Select Generate config to create the agent and move on.
Step 2: Download the configuration file
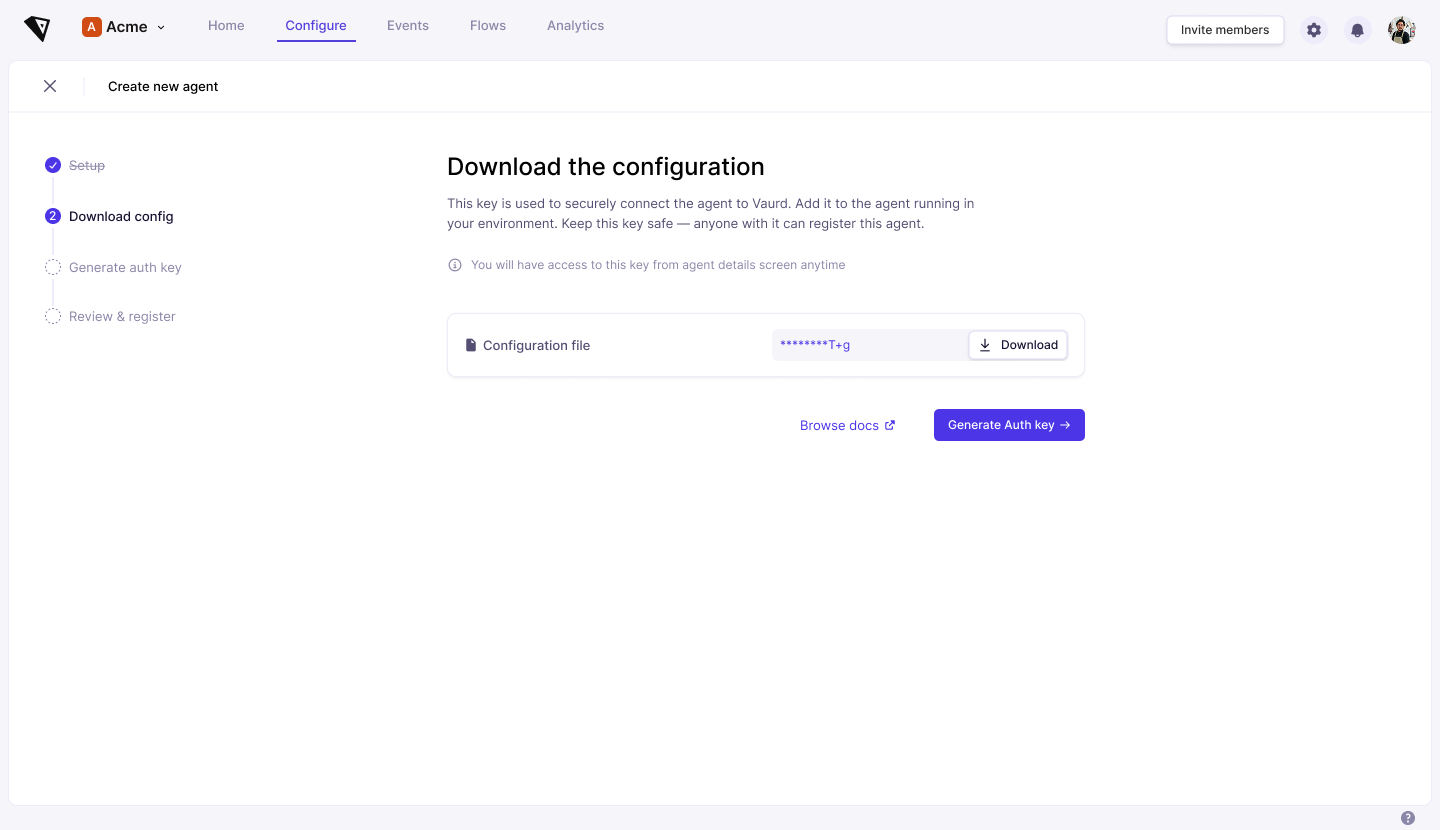
The platform generates a config.yml for this agent and offers it on the Download Configuration screen. Select Download.
This is a template. It already contains the TLS certificates, the platform address and the settings the agent needs to talk to Vaurd. What it does not contain is anything specific to your infrastructure, which you add yourself.
Add your data sources. Open the file and fill in the sources section with the connection details for each database the agent should read from:
sources:
  - name: orders_db
    type: database_postgres
    params:
      host: db.internal
      port: 5432
      user: vaurd
      password: <password>
database: ordersEach entry's name has to be identical to the technical name of the source you created in the platform. That name is how a flow's fetch node finds this connection. If they differ, the flow fails at run time with the source not found.
Source credentials stay in this file, inside your environment. They are never sent to Vaurd. See Source systems.
You can download this file again later from the agent's details screen, so it is not a one-time offer.
Select Generate auth key to continue.
Step 3: Generate the authentication key
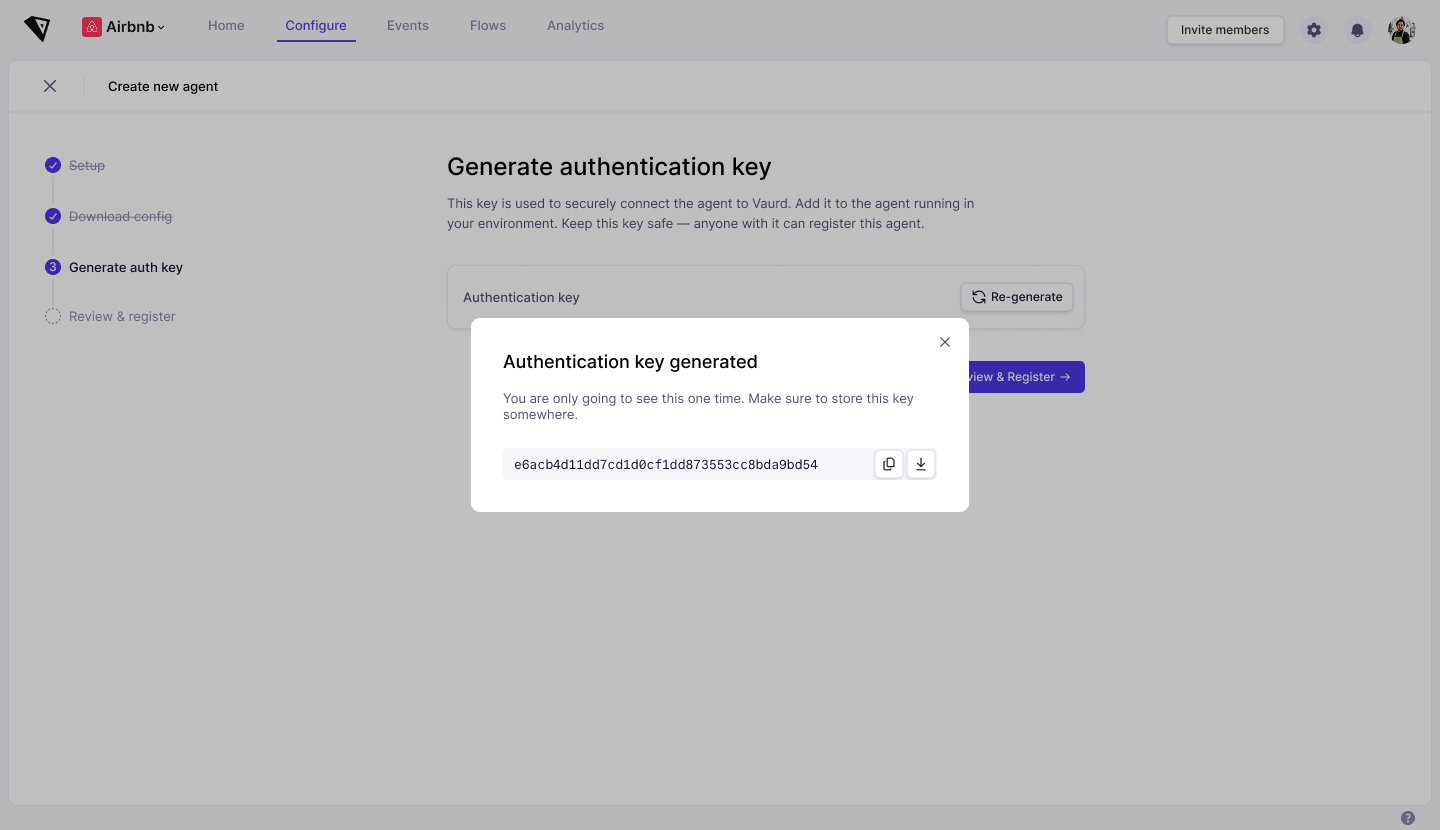
On the Generate Authentication Key screen, select Generate. The platform issues a license key for this agent.
This key is what the agent presents when it connects, and it is also what unlocks the agent's encrypted local database. Without it the agent cannot register or start.
Copy the key and paste it into your config.yml as the value of the top-level license field:
license: eyJhbGciOiJFZERTQSIsInR5cCI6IkpXVCJ9...
You cannot view this key again after leaving the screen. Copy it now. If you lose it, select Re-generate to issue a new one, but the agent's config must then carry the newest key. An older key stops working as soon as a new one is issued.
Treat the key like a password. Anyone holding it can register this agent.
Select Review & Register to continue.
Step 4: Deploy the agent
Leave the browser here and deploy the agent in your own environment, using the config.yml you have just prepared.
- Docker deployment: one compose file on a single host.
- Kubernetes deployment: the published Helm chart, or plain manifests.
Both pages list the changes the file needs so the components can find each other, mainly the shared data directory and the addresses for NATS and core.
Before moving on, confirm two things:
- The agent is running. Core has started and is listening on port 5001.
- Vaurd can reach it. The endpoint you entered in step 1 resolves to that port from outside your network.
Core answers the standard gRPC health check, so you can confirm both at once with grpcurl. It serves TLS using the certificates already in your config.yml, so point grpcurl at the CA certificate from that same file. This reads it out with yq and passes it straight through, with no temporary file to clean up:
grpcurl -cacert <(yq -r '.ca_cert' config.yml) <your-agent-endpoint>:5001 grpc.health.v1.Health/Check
Run it from the directory holding your config.yml, from outside your network, against the same endpoint you entered in step 1. A healthy agent replies:
{
  "status": "SERVING"
}
A connection refused means core is not running. A timeout means it is running but your network is not letting Vaurd through, and registration will fail in exactly the same way.
The <(...) syntax is a bash and zsh feature. In a shell without it, write the certificate out to a file first and pass that path to -cacert instead.
Registration fails if the platform cannot call the agent, so it is worth checking rather than discovering it in the next step.
Step 5: Review and start registration
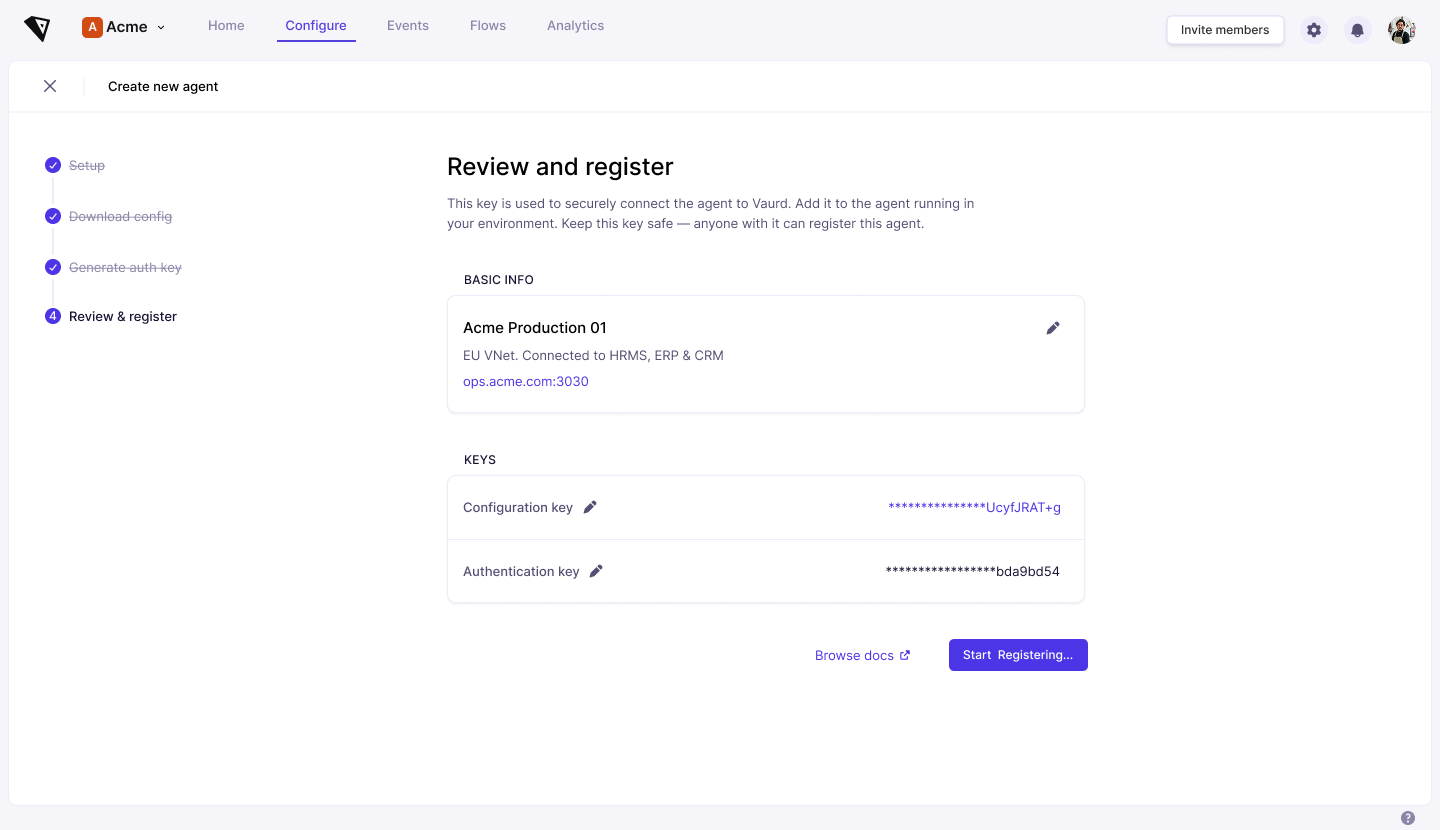
Return to the web application. The Review & Register screen shows what you entered in step 1, along with the configuration key and the authentication key, both masked. Use the edit icons to go back and change anything that is wrong.
When it all looks right, select Start Registering.
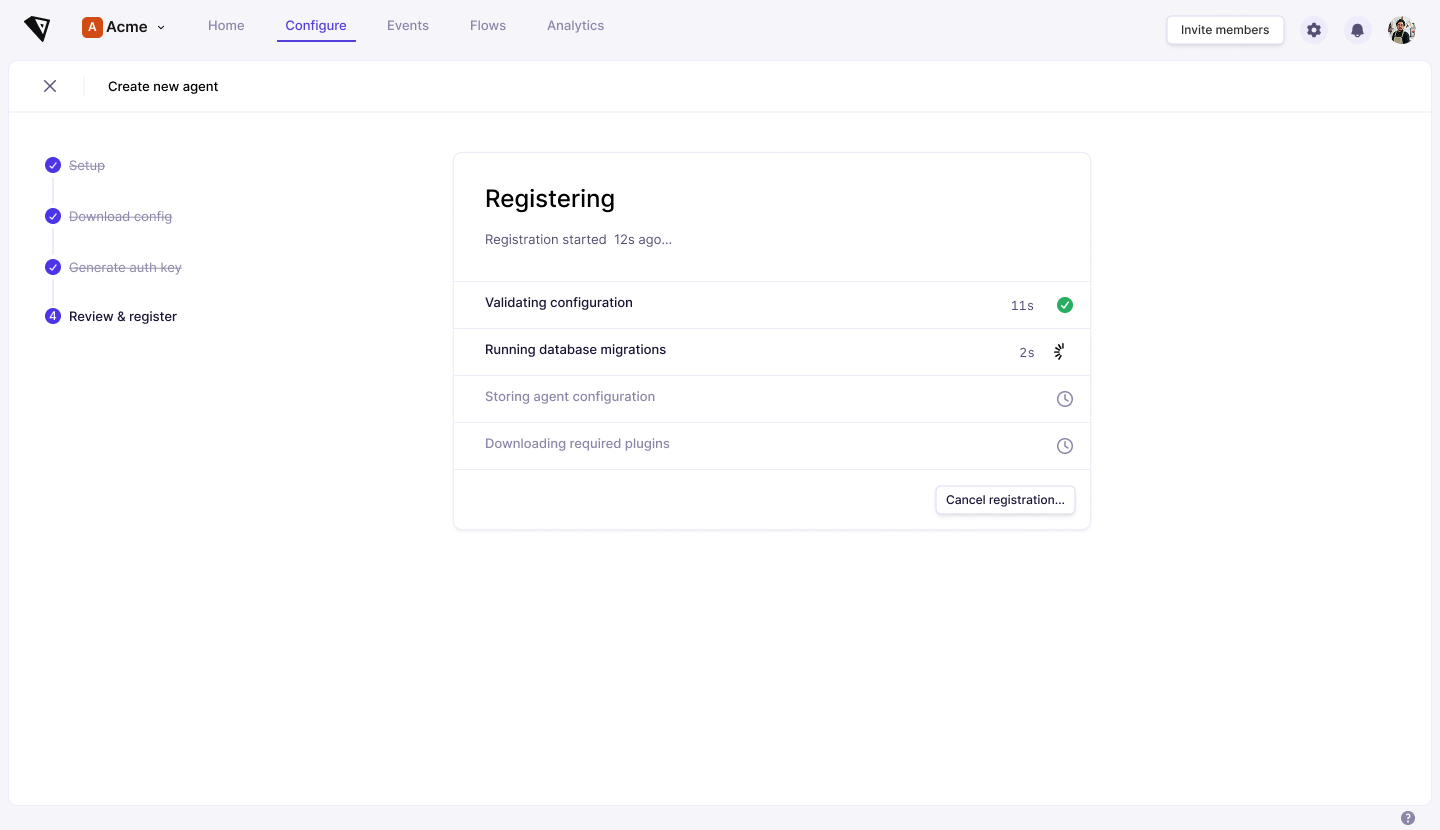
The platform connects to the agent and drives the registration through to completion. Progress appears live as it goes:
- Validating configuration: the agent checks that it has the platform address and certificate it needs.
- Running database migrations: the agent prepares its encrypted local database.
- Storing agent configuration: the agent records its identity and your organization.
- Downloading required plugins: the platform sends the plugin binaries for your configured source types, plus the flow scheduler, which every agent needs.
- Registration complete: the agent is ready.
Plugin downloads are the slowest part, so expect this to take a little longer than the other steps.
If registration fails, the screen offers to try again and the log explains what went wrong. The two common causes are an endpoint the platform cannot reach and an authentication key that does not match the one in the agent's config.
After registration
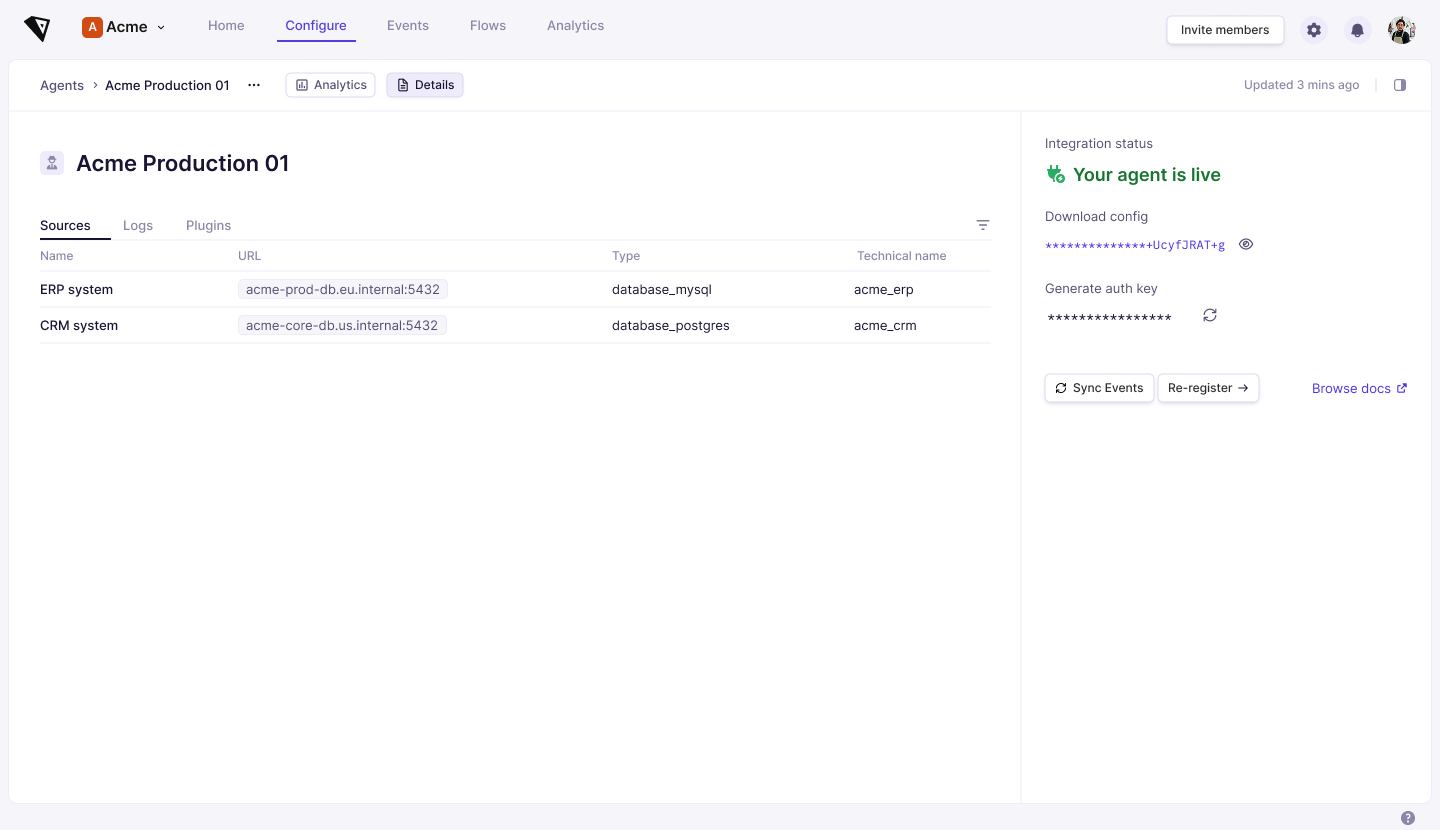
The agent moves to Connected once its heartbeat starts arriving, and it appears as connected in Configure → Agents.
From here you can publish flows to it and start posting events.
The agent's details screen gives you:
- Sources: the data sources this agent is connected to, read from its config.
- Plugins: which plugin versions it has installed, and when.
- Registration logs: the full log of each registration attempt, useful when one fails.
Re-registering an agent
You re-register when the agent's identity or keys change, for example after rotating its authentication key or moving it to a new endpoint.
From the agent's details screen, select Re-register. This walks the same steps again. You can also regenerate the configuration file or the authentication key on their own, from Download Config and Generate auth Key on that screen.
Whenever you regenerate the authentication key, update the agent's config.yml with the new value and restart the agent. The previous key stops working immediately.